First Panel, First Choice: Copper Foil and Lead Came Compared for UK Makers
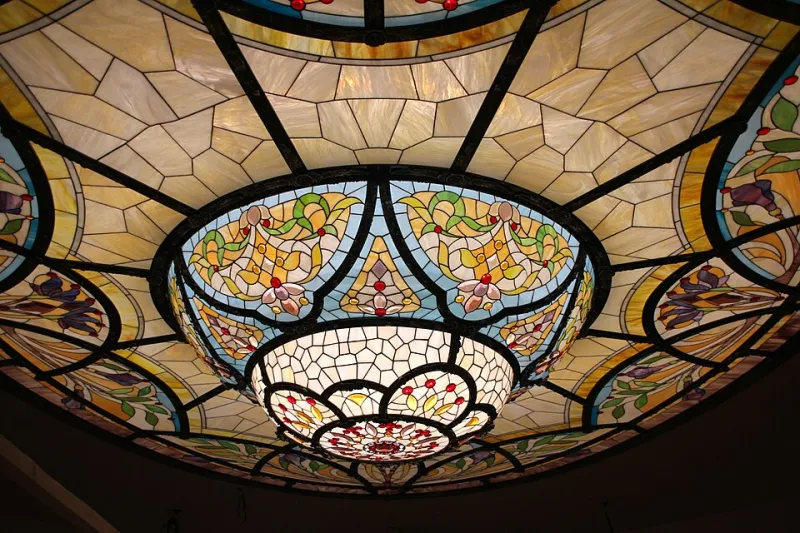
Photo: Lebedevglass, CC BY-SA 4.0, via Wikimedia Commons
So you have a glass cutter, a pattern and a kitchen table that is about to become a studio. The first real decision is not the design. It is the method. Copper foil and lead came both hold stained glass together, but they behave differently under the hand, in the frame and in a British winter. This is not a case of one being 'proper' and the other being a shortcut. It is a case of matching the method to the job, your space and your patience.
Start with the shape of the job
Copper foil wraps each piece of glass in a narrow strip of adhesive-backed metal, then solder joins the pieces at the seams. The result is a fine, delicate line and a panel that can take quite intricate shapes. Lead came works differently. The glass sits inside an H-shaped channel of lead, and the joints are soldered where the came meets. It gives you a broader, more traditional line and a panel with more inherent give.
For a first panel, the useful question is simple: where is it going? If you are making a small suncatcher or an indoor panel for a window that never gets wet, copper foil is often the friendlier route. If you are making something larger, structural or destined for the garden, lead came starts to make more sense. A first panel of around A4 size, kept indoors, can be either. A first panel that will face rain, wind and frost should not be a delicate copper-foil experiment unless it is properly framed and sheltered.
Tools and the real cost of starting
A basic copper-foil kit tends to include a soldering iron, glass cutter, grozing pliers, foil, flux, solder, a grinding bit and some sort of surface to work on. You can spend £120 to £250 on entry-level kit and still find yourself buying better blades, more foil and a temperature-controlled iron before long. The iron is the item not to skimp on. A cheap iron that swings hot and cold will make neat soldering feel impossible.
Lead came asks for a different shopping list: a lead knife or lead nippers, a lead vice or stretcher, horseshoe nails, came in a few widths, solder, flux, cement and a stiff brush. Budget nearer £180 to £350 for a starter set, depending on what you already own. Both methods share the same glass-cutting tools, safety glasses and cleaning materials.
UK supplier choice matters more with lead came because postage is heavy and awkward. Warm Glass, Creative Glass and various regional stained-glass shops are common ports of call, but it is worth checking whether a local supplier or a workshop sells offcuts and short lengths. Foil is easier to post, but check the width and backing. A 5/32 inch foil is a common starting point for jewellery-scale work, while wider foils suit bigger pieces and thicker glass.
Strength, movement and weather
Lead came is flexible. That is its strength and its weakness. A leaded panel can move slightly with temperature and building movement, which helps in old doors and large windows, but it also means the panel needs support. Long horizontal runs may need saddle bars or a sturdy frame. Lead also needs cementing or puttying to weatherproof the gaps between glass and came. Skip that step and a garden panel will collect water like a saucer.
Copper foil produces a more rigid panel once soldered, but the bond depends on clean glass, tight foil and a continuous solder bead. It is excellent for small decorative work and for panels that live indoors. It is less forgiving when exposed to driving rain, especially if the panel is not framed. For a UK garden, a copper-foil panel can work in a sheltered porch or behind a protective frame, but a leaded panel with proper cement and support is usually the safer first outdoor project.
Glass choices for a first go
Keep it simple. A medium opal or a cathedral glass around 3mm thick is a sensible starting point. Cathedral glass lets light through and shows off colour; opals hide a multitude of soldering sins but can be harder to cut if heavily textured. Avoid thick slab glass, fusing glass and anything with wild lumps until you know how your cutter behaves. For copper foil, the glass edges need to be ground smooth enough for the foil to sit flat. For lead came, the channel depth dictates how much glass sits inside the lead, so consistent thickness helps enormously.
Offcut boxes are a good way to build a palette without buying full sheets. They are also a useful reminder that stained glass is often a craft of leftovers and happy accidents.
Common mistakes worth avoiding
Too much solder is the classic beginner's error. A lumpy bead does not mean a stronger panel. Neither does skipping flux, soldering dirty glass or moving the panel before the solder has cooled. With lead came, stretching the lead too thin, using the wrong channel width or failing to support a long panel will come back to bite. With copper foil, poor foil adhesion and inconsistent grinding are the usual culprits.
Safety is part of the method choice. Lead came means handling lead, so wash your hands, keep food away from the bench and ventilate the room when soldering. Flux fumes are not a friendly addition to a spare bedroom. Eye protection matters when cutting and grinding, and a proper work surface saves your table and your temper.
A simple decision framework
Ask yourself five questions. Is the panel going outdoors? If yes, lean towards lead came. Is it smaller than a sheet of A4 and staying indoors? Copper foil is probably fine. Is the design full of tight curves and small pieces? Copper foil gives you more freedom. Is it larger than about 40cm across? Start thinking about lead came, support and possibly a frame. Do you have a workshop or just a kitchen table? Copper foil is easier to contain, but both methods need ventilation and a safe place to leave work mid-flow.
If the answer points to a front-door panel or a large window, that is not really a first-panel project. Make a small suncatcher first, learn how the solder moves, then consider a course or a commission for the bigger job. At H&P Stained Glass, we would rather see a beginner finish a modest panel with pride than wrestle a garden-sized design into submission on the first attempt.
In 2026, there are more UK taster courses and online guides than ever, but the old rule still holds: choose the method that suits the panel, not the one that looks best in a photograph.