Between Kettle and Cooker: Commissioning a Kitchen Splashback in Stained Glass
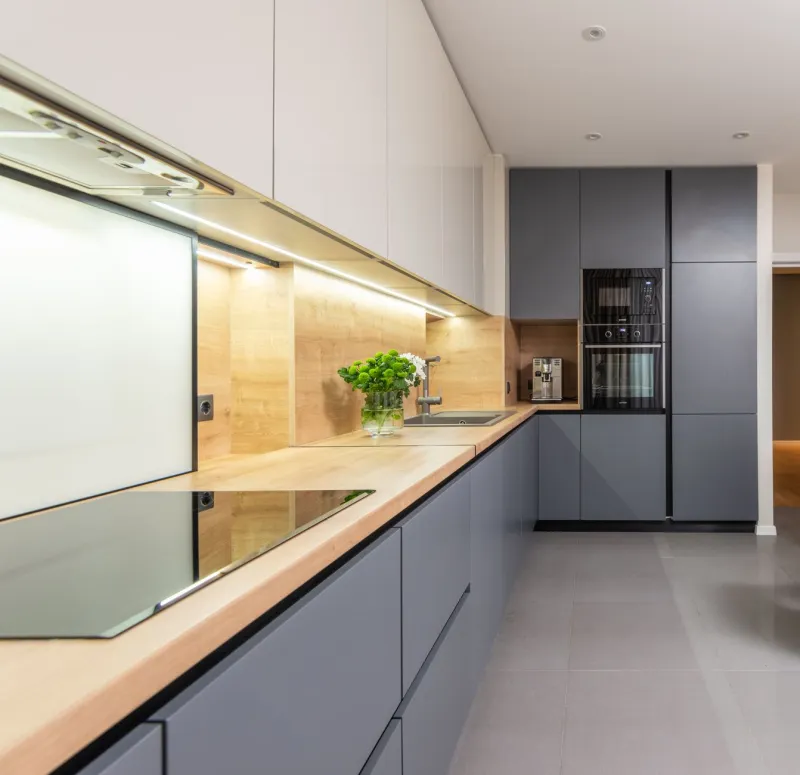
Kitchen glass is a different animal from window glass. A window is allowed to be a little bit precious: it sits above eye level, catches the weather and rarely has to justify itself against a frying pan. A splashback lives at the sharp end. It gets splattered, steamed up, wiped down and occasionally leaned on. If you want stained glass behind the hob or sink, the brief has to be as practical as it is pretty. We call it beautiful but buildable.
Start with the worktop, not the pattern
It is tempting to begin with colours and motifs. Resist that for a week. The first conversation should be about millimetres. How deep is the worktop? Is there an upstand? Where exactly do the sockets fall, and how far is the extractor above the hob? A splashback is a fitted object, not a hanging picture, so the pattern has to work around the fixed points rather than the other way round.
Send the studio a simple elevation drawing or a set of photos with a tape measure in shot. Include the hob type — gas, induction or ceramic — and the extractor model. If the wall is stud rather than solid, say so. If the kitchen is still being fitted, wait. Templating before the units go in is how optimistic rectangles become expensive firewood.
Heat, grease and the hob question
Directly behind a gas hob is the most demanding spot in the kitchen. We usually steer clients towards an encapsulated panel: the leaded or foiled design is sealed behind toughened glass, with a heat-resistant backing and a sensible air gap. That keeps grease out of the lead lines and gives you a wipe-clean face. It also means the glass can expand and contract without stressing the came.
Stained glass is not a fireguard. Check the hob manufacturer’s clearance and the extractor specification before anyone cuts glass. Induction hobs throw less radiant heat than gas, but steam and spitting fat still find their way. A splashback that runs behind the sink has a different job: it is mostly about water, splashes and hard-water marks, so sealed edges and a smooth surface matter more than heat.
Fixing: what goes behind the glass
There are several ways to mount a kitchen panel, and the right one depends on the wall, the size of the piece and whether it needs to come off again. Small panels can hang on mirror plates or clips. Larger splashbacks are usually bonded to a prepared substrate with neutral-cure silicone and finished with a neat bead at the edges. Avoid general-purpose adhesives that go brittle or stain the glass.
Sockets and switches need to remain accessible and properly sealed. We cut around them, not over them. The same goes for extractor ducting and any pipework boxing. If the panel is encapsulated, the edges should be sealed against steam, but the design still needs to allow for movement. A good installer will leave a small expansion gap and hide it behind a trim or silicone line, not jam the glass tight against the worktop.
Cleaning without dulling the glass
A kitchen splashback should be easy to live with. Warm water, a drop of washing-up liquid and a soft cloth will handle most grease. Dry afterwards with a microfibre cloth to avoid water marks, especially in hard-water areas. Avoid abrasive creams, scouring pads and steam cleaners. Vinegar is fine on tiles but not on lead came, where it can attack the patina.
Clean little and often rather than waiting for a full spring clean. A weekly wipe over the area behind the hob stops cooking fat building up in the corners. If the panel is sealed behind toughened glass, you are really cleaning the glass face, not the lead. That is the point. The stained glass gets to be decorative; the tough glass does the dirty work.
Designing for task lighting
Under-cabinet LEDs are brilliant for chopping onions and brutal on glass. They can turn a beautiful panel into a mirror of glare if the design uses too much clear or highly textured glass. Opalescent, seedy or lightly textured glasses diffuse the light and keep the colours readable. Large, simple shapes work better than fine detail, which can turn to mud when viewed from a metre away with a saucepan in your hand.
Think about when you actually use the kitchen. In daylight, a splashback can be quite subtle. At 7pm, with the big light off and the cupboard lights on, it becomes a different object. Ask the studio to show the design against both. Warm ambers and soft greens tend to flatter task lighting; very dark blues and deep reds can go gloomy behind a worktop unless the room has plenty of other light.
What to send the studio
A useful brief includes dimensions, photos, hob and extractor details, socket positions, worktop material, cabinet colour and a note on the lighting plan. If you have a colour you want to pull from a tiles or a favourite jug, send a photo. If you are matching existing glass in the room, send a close-up in daylight. The more the studio knows before cutting, the fewer surprises land on the worktop.
A kitchen splashback is not the place for a fragile, high-maintenance diva. It is the place for colour that earns its keep: tough enough for steam, simple enough to clean, and clever enough to look good when the kettle is on.